
Hot showers on a cold morning. Clean dishes after dinner. Fresh laundry that actually smells fresh. All of that depends on one quiet hero sitting in a corner of the house. The water heater does its job day after day without applause. Until one day it does not. And that is when panic sets in.
At Best in town repair services the calls usually start the same way. No hot water. Weird sounds. A little puddle near the tank that no one noticed before. The good news is most of these problems can be prevented. A little care goes a long way. And it is not rocket science. Just simple steps done once in a while.
So here is a friendly guide on how to maintain your water heater step by step. Nothing fancy. Just practical stuff that works in real homes.
Why Does Water Heater Maintenance Even Matters?
A water heater works hard. It heats gallons of water every single day. Over time sediment builds up inside the tank. Parts wear out. Pressure changes. Small issues grow into big messy ones.
Regular maintenance helps
- Lower energy bills
- Longer heater life
- Better water pressure
- Fewer surprise breakdowns
And honestly nobody enjoys a cold shower shock. That wake up call is not fun.
Step 1: Turn Off the Power First
Safety first always. Before touching anything, switch off the power.
For electric heaters turn off the breaker in the electrical panel.
For gas heaters turn the gas valve to the off position.
Let the water cool a bit before doing anything else. Hot water can burn skin quickly. Slow and steady wins here.
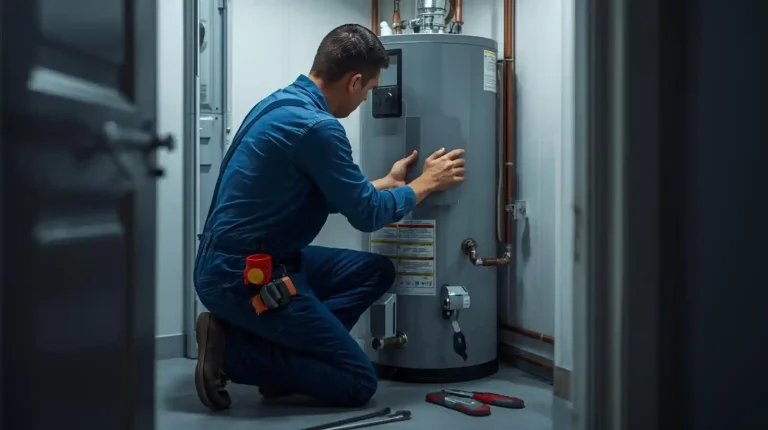
Step 2: Check for Leaks and Rust
Walk around the tank. Look at the bottom. Check the pipes on top. See any water pooling. Notice rust spots. Feel dampness around connections.
Small drips may not seem serious but they are warning signs. Tightening a loose connection might fix it. But heavy rust or large leaks usually mean the unit needs professional attention.
At Best in town repair services many homeowners call only after a tiny leak becomes a mini indoor pool. Catching it early saves money and stress.
Step 3: Flush the Tank
This step is a big one. Over time sediment settles at the bottom of the tank. This sediment makes the heater work harder. It can also cause rumbling or popping sounds.
To flush the tank
- Attach a garden hose to the drain valve near the bottom
- Run the hose to a safe drainage area
- Open the valve and let the water flow out
The water may look cloudy at first. That is normal. Once it runs clear the tank is cleaner.
Doing this once a year is usually enough. In areas with hard water maybe twice a year. Hard water is stubborn. It leaves mineral buildup like it owns the place.
Step 4: Test the Temperature Pressure Relief Valve
This small valve plays a big safety role. It releases pressure if it gets too high inside the tank.
To test it gently lift the valve lever and let it snap back. A little water should come out through the discharge pipe.
If nothing happens or it keeps leaking after testing the valve might need replacement. This is not something to ignore. Too much pressure inside a tank is risky.
Step 5: Check the Anode Rod
Now this part sounds fancy but it is simple. The anode rod is a metal rod inside the tank. Its job is to attract corrosion. It sacrifices itself to protect the tank. Pretty heroic actually.
Over time it wears down. If it is fully corroded the tank can start rusting from the inside.
Checking it once every two to three years is smart. If it looks thin or heavily coated with buildup replacing it can add years to the heater life.
This step might need a wrench and some effort. If unsure, calling a professional is always safer.
Step 6: Adjust the Temperature
Many heaters are set too high. Keeping the temperature around 120 degrees Fahrenheit is usually safe and energy efficient.
Lower temperature
- Reduces energy bills
- Prevents scalding
- Slows mineral buildup
Small adjustments have a big impact. Simple as that.
Step 7: Insulate the Tank and Pipes
If the heater sits in a cold garage or basement insulating it helps keep heat in. Tank blankets are affordable and easy to install.
Also insulating the first few feet of hot water pipes reduces heat loss. This means faster hot water at taps and less waiting around tapping fingers on the sink.
Not life changing. But nice.
Signs Your Water Heater Needs Help
Even with good care problems can pop up. Watch for
- Water not getting hot enough
- Strange noises like banging or rumbling
- Discolored water
- Metallic smell
- Frequent pilot light issues
These signs mean it is time to call experts like Best in town repair services. Better safe than soaked.
How Often Should Maintenance Be Done?
Quick check for leaks every few months
– Tank flush once a year
– Anode rod check every two to three years
– Professional inspection every year if possible
It sounds like a lot but most steps take less than an hour. And that hour saves future headaches.
Final Thoughts
A water heater may not be glamorous. No one shows it off during house tours. But when it fails everyone notices. Regular maintenance keeps it running smoothly and keeps daily life comfortable.
Best in town repair services believes prevention is better than emergency repairs. A little yearly care avoids cold showers, surprise leaks and expensive replacements.
Treat the water heater kindly. Give it attention once in a while. It works hard every day quietly in the background. And honestly it deserves a bit of care.
FAQs
Most traditional tank water heaters last 8 to 12 years. With proper maintenance some last even longer. Neglect shortens that life fast.
Yes it is. Sediment buildup makes the heater less efficient and can damage the tank. Skipping this step is like never changing car oil.
Simple checks like looking for leaks are fine. But if unsure about parts or tools, calling trained technicians is safer. Mistakes can be costly.
Absolutely. Clean tanks heat water faster and use less energy. Small savings each month add up over time.


